
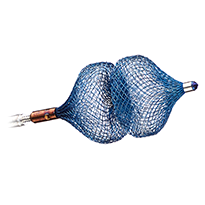
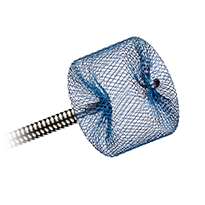
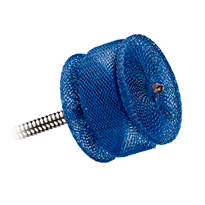
Amplatzer™ Vascular Plug 4 (AVP 4)
Deployment
Note: This section should not be used in place of the Instructions for Use. This section only provides an overview of the procedure. Refer to the Instructions for Use for additional information.1
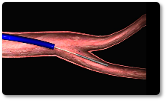
Access the vessel and perform an angiogram using standard technique to measure the diameter of the vessel at the desired occlusion site.
Select a vascular plug with a diameter approximately 30-50% larger than the vessel diameter at the occlusion site. Ensure that the occlusion site has sufficient length so the deployed device length will not obstruct other vessels or anatomical structures.
Deployment Steps
| Deployment Steps | |
|---|---|
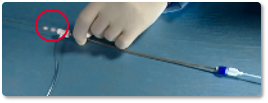
| 1 | a) Flush with sterile saline through the stop cock until fluid exits the distal tip to purge air from the loader. NOTE: If the AVP 4 is inadvertently deployed before use, follow these additional steps prior to use:
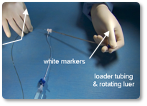
b) grasp the spring-loaded tapered loader tubing and the rotating luer in one hand and retract the delivery wire with the other hand.c) Continue to retract the delivery wire until both the single white marker and the double white markers on the delivery wire are visible. Make sure the device is fully retracted into the loader. d) Reflush the device if necessary. |
| 2 | Remove device (in loader) and delivery wire from the hoop dispenser. |
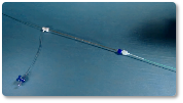
| 3 | Select a delivery catheter with an internal diameter that will accommodate the selected device. The original access catheter may be used if the internal diameter is sufficient for the selected device. Prepare the catheter for use (according to the manufacturer’s instructions for use). |
| 4 | Advance the delivery catheter over the guidewire until the distal tip of the catheter is at the distal edge of the occlusion site (according to the manufacturer’s instructions for use). |
| 5 | Remove the guidewire. |
| 6 | Insert the tapered tip of the loader into the hub of the 0.038 inch guidewire compatible diagnostic catheter. NOTE: Do not connect the luer through a stopcock, hemostasis valve, Y-connector or other valve. This will result in damage to the loader. |
| 7 | Grasp the rotating luer and press the luer to the hub of the catheter and rotate clockwise to ensure full engagement of the loader to the catheter hub. |
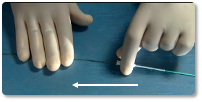
| 8 | Advance the delivery wire until the double white marker is as the hemostasis valve. |
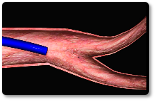
| 9 | Hold delivery wire in place and slowly retract the delivery catheter to deploy the device at the occlusion site. |
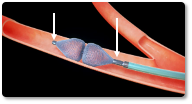
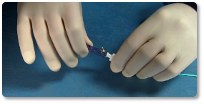
| 10 | Verify position of the device using the radiopaque marker bands. ~ If unsatisfactory, stabilize the wire and re-advance the delivery catheter until the device is completely within the catheter. Reposition and deploy, or remove the device from the patient. ~ If satisfactory, attach the plastic vise to the wire and rotate the delivery wire counterclockwise until it separates from the device. |
| 11 | Remove delivery catheter and wire from the patient. |
Steps 1-2

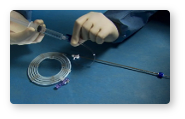
Steps 3-5
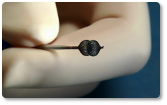
Steps 6-8
Steps 9-11
References
- Amplatzer™ Vascular Plug 4 – Instructions for Use
MAT-2402442 v1.0