
Refer to Instructions for Use (IFU) for additional information
Deployment & Suture Management
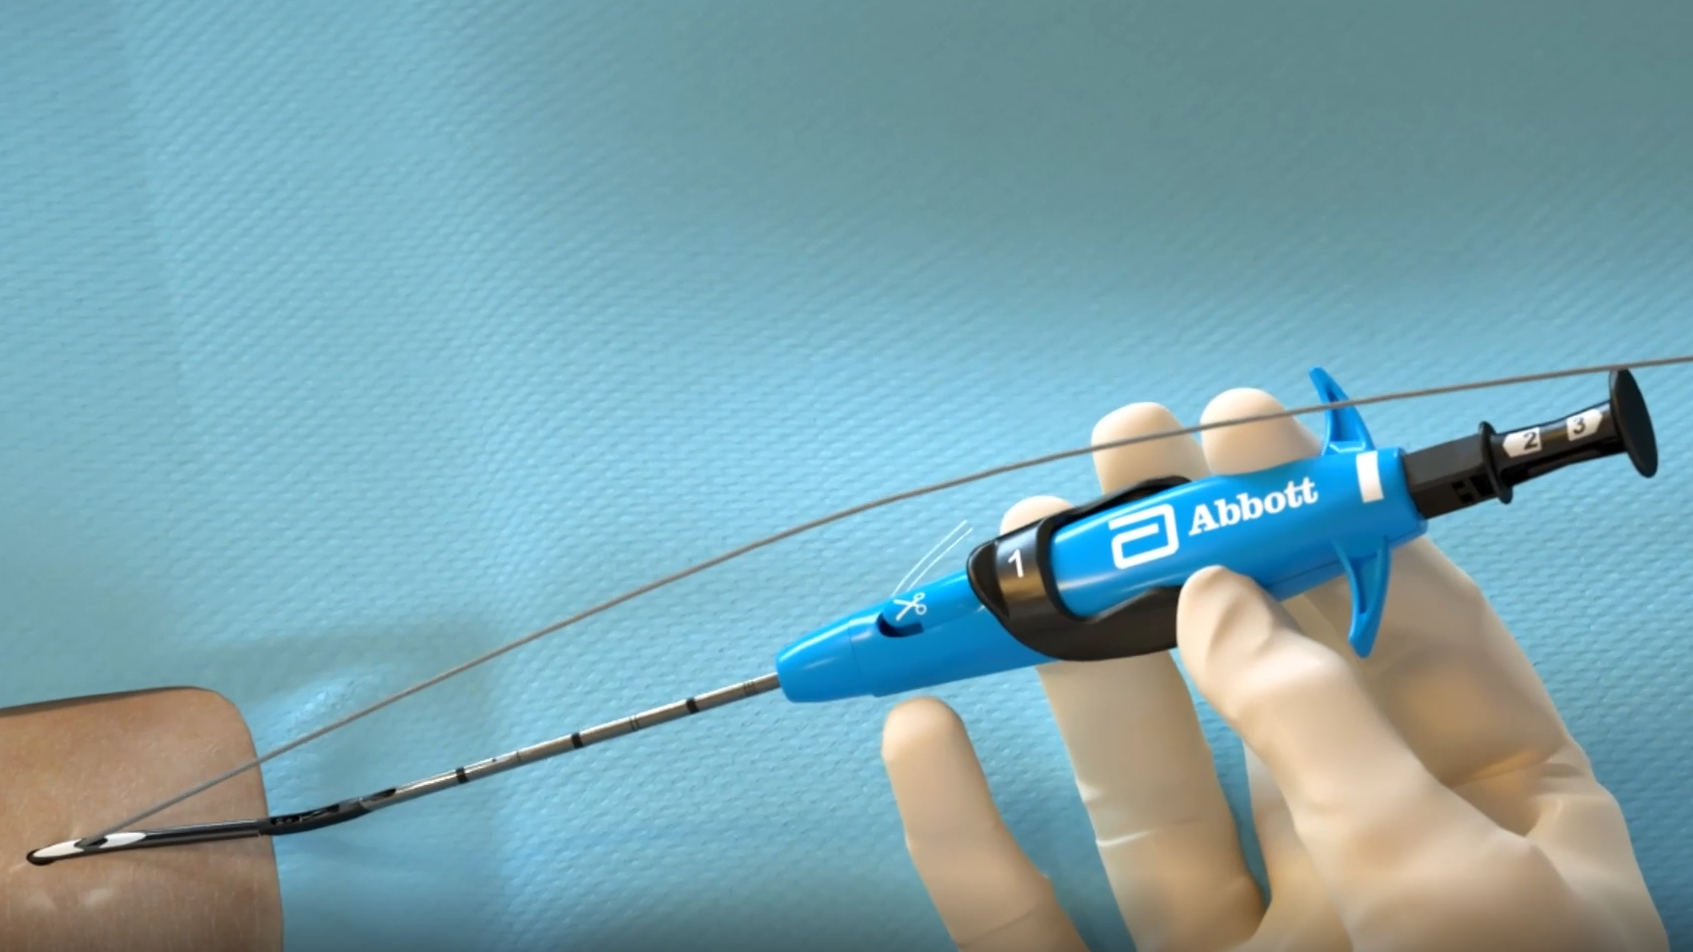
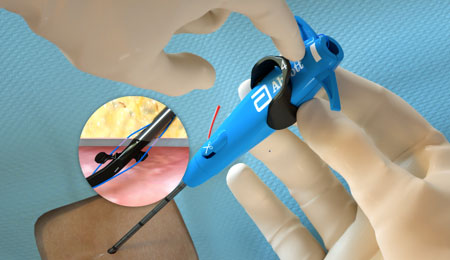
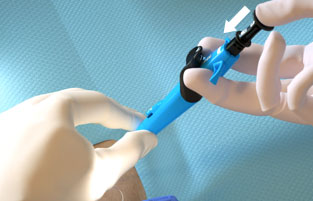
Device Preparation
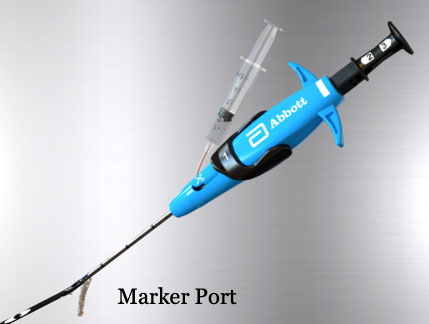
To prep the device, verify Marker Lumen patency by flushing it with saline until saline exits the Marker Port.
4 Key Steps to Suture Deployment
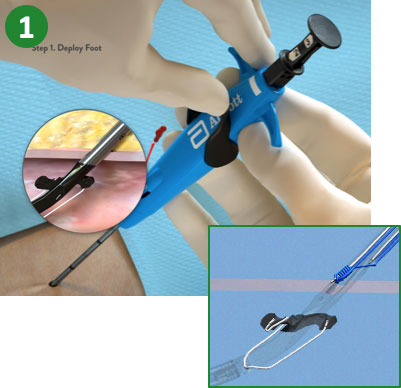
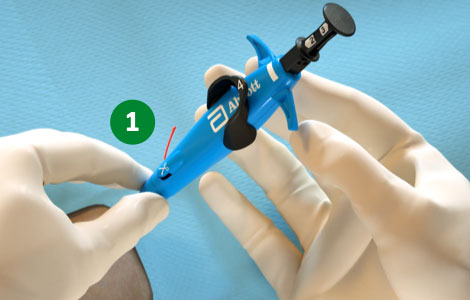
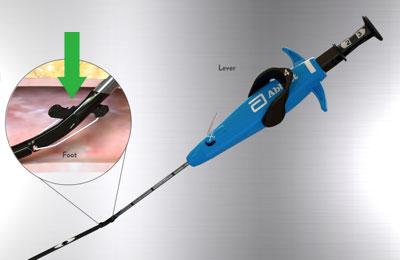
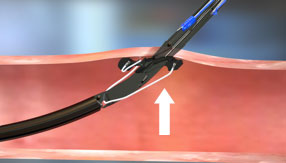
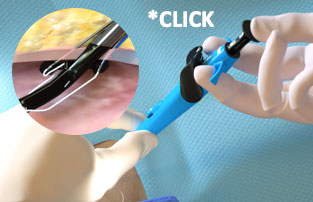
1. Advance device & lift Lever (Open Foot)
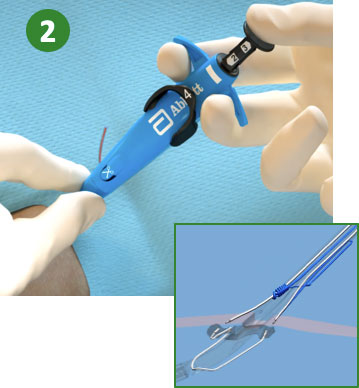
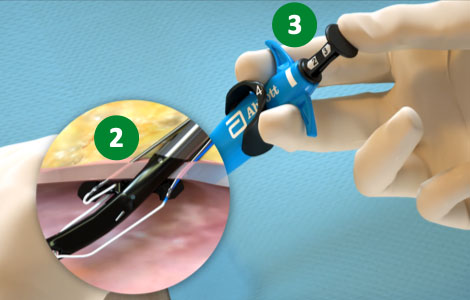
2. Maintain retraction and depress Plunger (Deploy Needles)
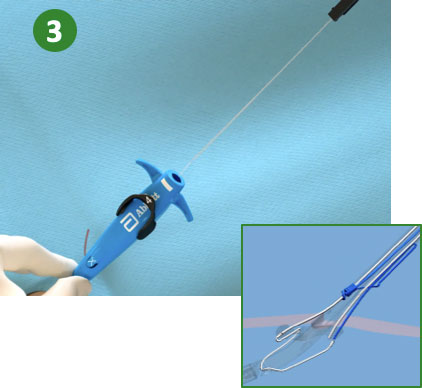
3. Pull back Plunger (Deploy Suture)
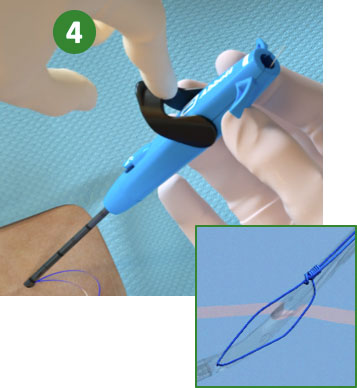
4. Lower Lever (Close Foot)
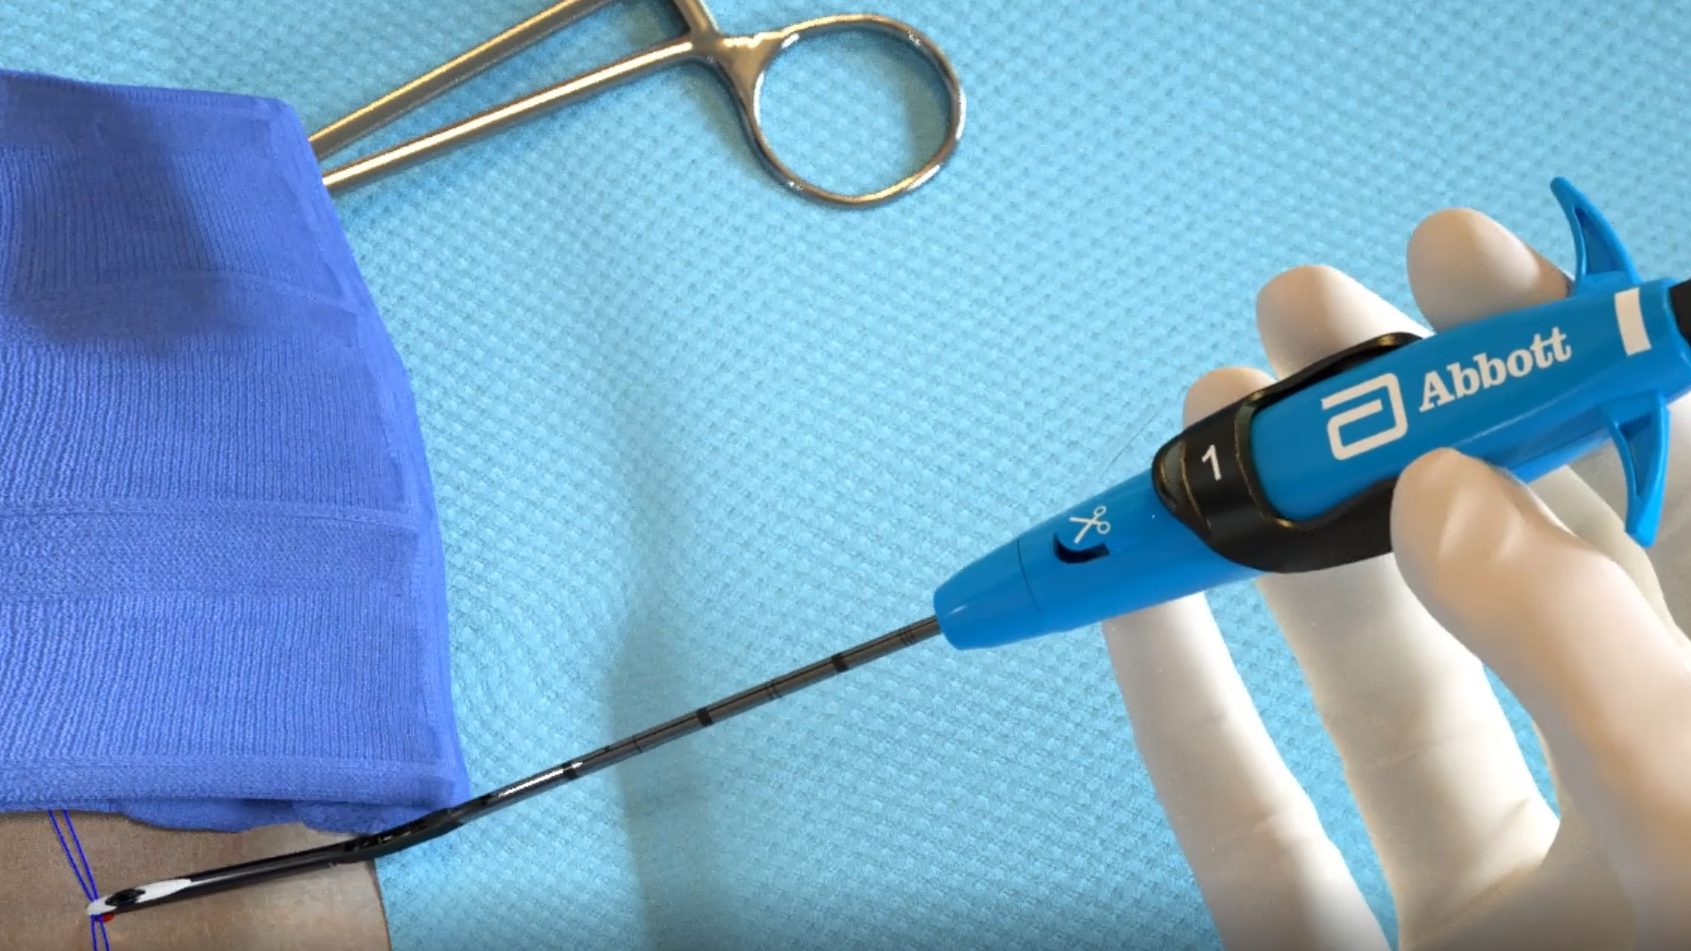
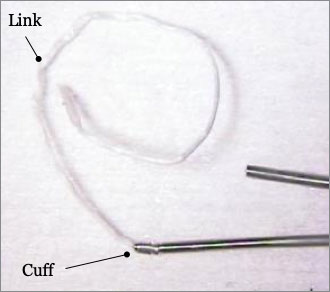
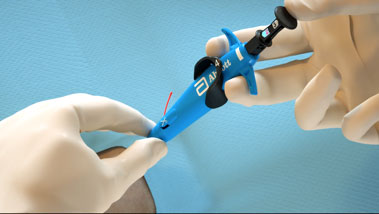
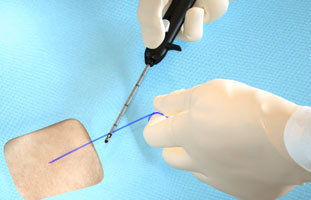
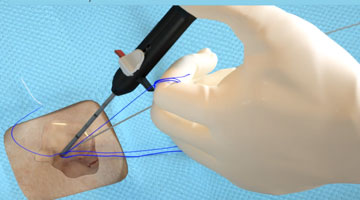
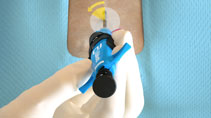
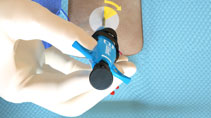
Suture Management
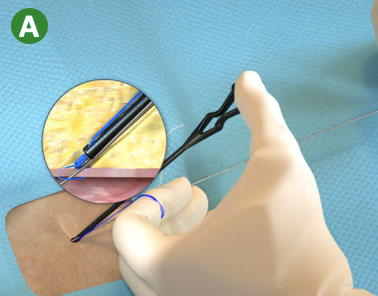
A. Load the blue (rail) suture limb in the Snared Knot Pusher (or in the Suture Trimmer) and advance the Suture Knot
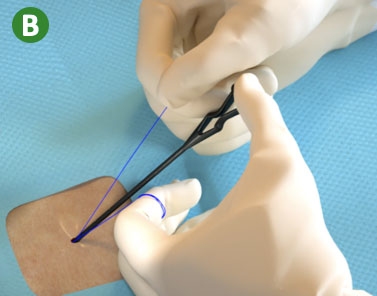
B. Lock Suture Knot by pulling white (non-rail) suture limb

C. Trim suture limbs by pulling Trimming Lever
Single and Multiple Device Deployment
View the animation library for System Overview, Device Preparation, and full deployment steps for Single Device Deployment and Multiple Device Deployment techniques.
System Overview
Single Device Deployment
Multiple Device Deployment
Tips and Techniques
Refer to Instructions for Use for additional information.
Foot Break
Causes/Observations
Potential causes during Plunger deployment (Step 2)
- Rotating/rocking the device or excessive force during Plunger deployment
- Shallow (less than 45º) Plunger deployment angle
Potential observations after Plunger removal (Step 3) and/or device removal
- No Suture or link present
- Just a link and no Suture present
- Missing part of Foot when the device is removed
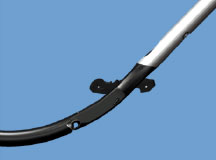
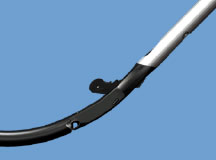
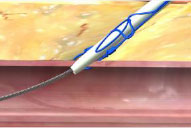
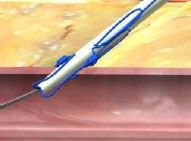
Deployment Angle During plunger deployment (Step 2)
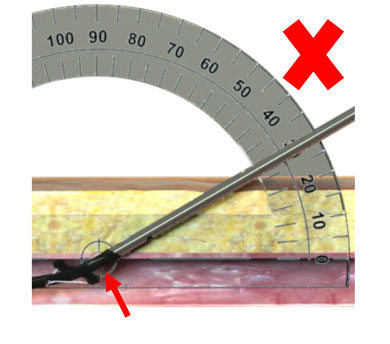
 Shallow Deployment Angle
- Sub-optimal in any tissue conditions
- Potential gap between Posterior Foot and vessel wall increases chance for foot break and cuff miss
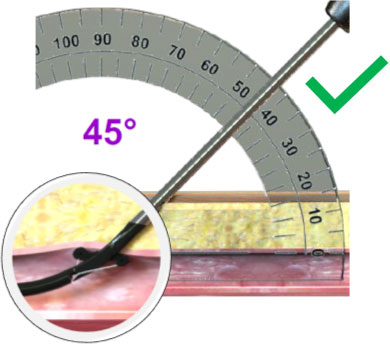
 45º Deployment Angle
- Ideal in healthy compliant tissue conditions
- Posterior and Anterior Foot appose evenly to compliant vessel wall
Foot Break Prevention
- Position the Perclose™ device at 45º angle and keep stable with the left hand during Plunger deployment
- The deployment angle may vary slightly depending on anatomy
- Maintain even and gentle tension over the Anterior and Posterior Foot against the vessel wall
- The key is to raise the device until pressure is evenly distributed across the Anterior and Posterior Foot
- Press down on the Plunger with a gentle, increasing pressure to advance the Needles
- The Needles are more susceptible to deflecting off calcification with higher Plunger force and higher Needle speed
Device Removal
Before attempting to remove the device:
- Relax the device before pushing the Lever down
- Push the Lever down to return Foot to the closed position
Device Entrapment
Observations
Difficult or unable to lower the Lever (close the Foot) and remove device after the Suture Deployment
Causes & Prevention
| Potential Causes | Prevention |
|---|---|
|
|
|
|
|
|
|
|
|
|
Cuff Miss

No suture or link present
Cuff and link present, no Suture
- Plunger is withdrawn and no Suture is present. The link may or may not be attached to Anterior Needle
- Tip(s) of Needle(s) did not lock with Cuff(s)
Potential Causes

- Tissue too thick and the Needle(s) cannot lock with Cuff(s); certain anatomical conditions such as heavily calcified arteries or scarred tissue.
- Incomplete advancement of Plunger; black Collar on Plunger did not contact Body of Perclose™ device.
- Changing the angle, rotating or rocking the device may make the Needles more susceptible to deflection.
- Not stabilizing device or maintaining the device at 45º throughout deployment and retraction of Plunger/Suture.
Prevention/Resolution
Prevention
- Proper patient selection
- Deploy device at 45º angle
- Maintain gentle retraction against the vessel wall
- Stabilize device with left hand during Plunger deployment
- Ensure black Collar on Plunger contacts the device Body
- Maintain and stabilize the device at 45º angle throughout removal of Plunger/Needles and until Suture is fully retracted
Resolution
- Insert wire and exchange for another device
Suture Break
Causes/Prevention
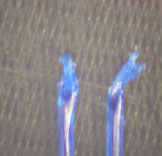
- Suture may look thin and elongated
- Rail or non-rail limbs can break
- Load Suture at mid-point of Suture Trimmer (Do not load at tip)
- Keep Thumb Knob retracted until Suture limbs drop into Suture Gate (Do not close Suture Gate on the Suture)
- Keep Thumb Knob toward ceiling (Do not rotate Suture Trimmer)
- Keep suture limbs coaxial to Suture Trimmer and tissue tract at all times
- Do not pull laterally or medially on Suture
- Apply slow, consistent, increasing tension (Avoid quick, jerky movements)
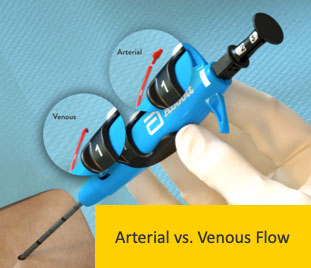
Poor Flow
Poor Arterial Flow / No Flow
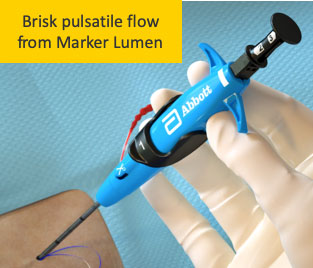
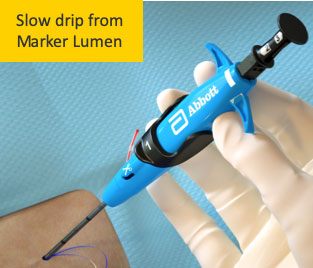
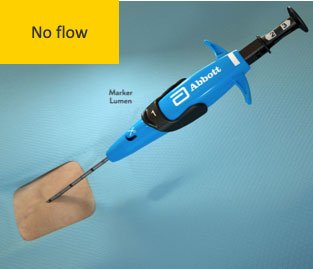
Resolution
Marker Port against vessel wall
- Do not deploy Perclose™ devices with vessel diameters <5 mm
Side wall stick
- Gently rotate device to move Marker Port off vessel wall
Low blood pressure
- Slow drip is acceptable if Perclose™ device position is confirmed
Clot or tissue plugging Marker Port
- Retract device until Marker Port is above skin. Re-flush Marker Lumen and observe saline exit Marker Port
Device not in vessel lumen
- Drip can occur when Marker Port is near vessel lumen but not completely in the vessel, especially with high blood pressure or 7/8F sheaths
- Continue advancing the Perclose™ device until brisk pulsatile flow is observed
Poor Venous Flow / No Flow

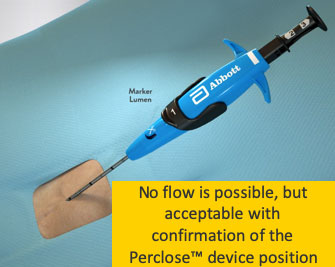
Resolution
No flow is possible and acceptable if device location is confirmed
- Apply pressure on groin or lower abdomen
- Inject contrast through Marker Lumen
- Use ultrasound to confirm location of device
- Have the patient perform the Valsalva maneuver
Marker Port against vessel wall
- Small vessel diameter; if not 5 mm vessel, do not deploy
Side wall stick
- Gently rotate device to move Marker Port off vessel wall
Low blood pressure
- Slow drip is acceptable in vein
Clot or tissue plugging Marker Port
- Retract device until Marker Port is above skin. Re-flush Marker Lumen and observe saline exit Marker Port
Device not in vessel lumen
- No flow can occur when Marker Port is near vessel lumen but not completely in the vessel
- Continue inserting device until slow drip occurs
Lack of Hemostasis
Lack of hemostasis may be a result of incorrect order of knot advancement or tangled sutures.
Incorrect Order of Knot Advancement
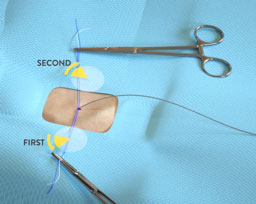
- Advance Sutures in the order of deployment
- First Suture deployed is on the "bottom" or closest to the vessel. If Second Suture is tightened out of order, it may result in tangled Sutures and/or the inability to tighten the First Suture successfully
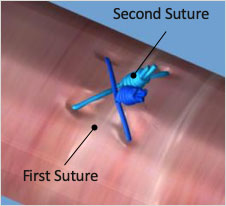
Tangled Sutures
- After initial knot advancement of all Sutures, continue to tighten and lock each knot in the order deployed
- Tightening and locking the Second Suture before the First Suture is completely secure can result in an incomplete or "partial" close
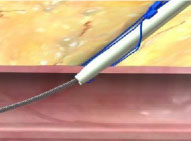
- After Suture Deployment, a clamp is immediately placed on the Suture limbs. A gentle retraction is placed on the clamp until the Suture is taut. This removes all Suture slack from the tissue tract
- If Suture slack is not removed, the Sutures can become tangled or pushed into the vessel during insertion of procedural sheaths and device exchanges
MAT-2103413 v2.0